Integrasi ESP32-CAM dengan AI Detection
Membangun sistem IoT untuk deteksi objek real-time menggunakan ESP32-CAM, YOLOv5, dan Flask. Dari hardware hingga deployment.
Integrasi ESP32-CAM dengan AI Detection
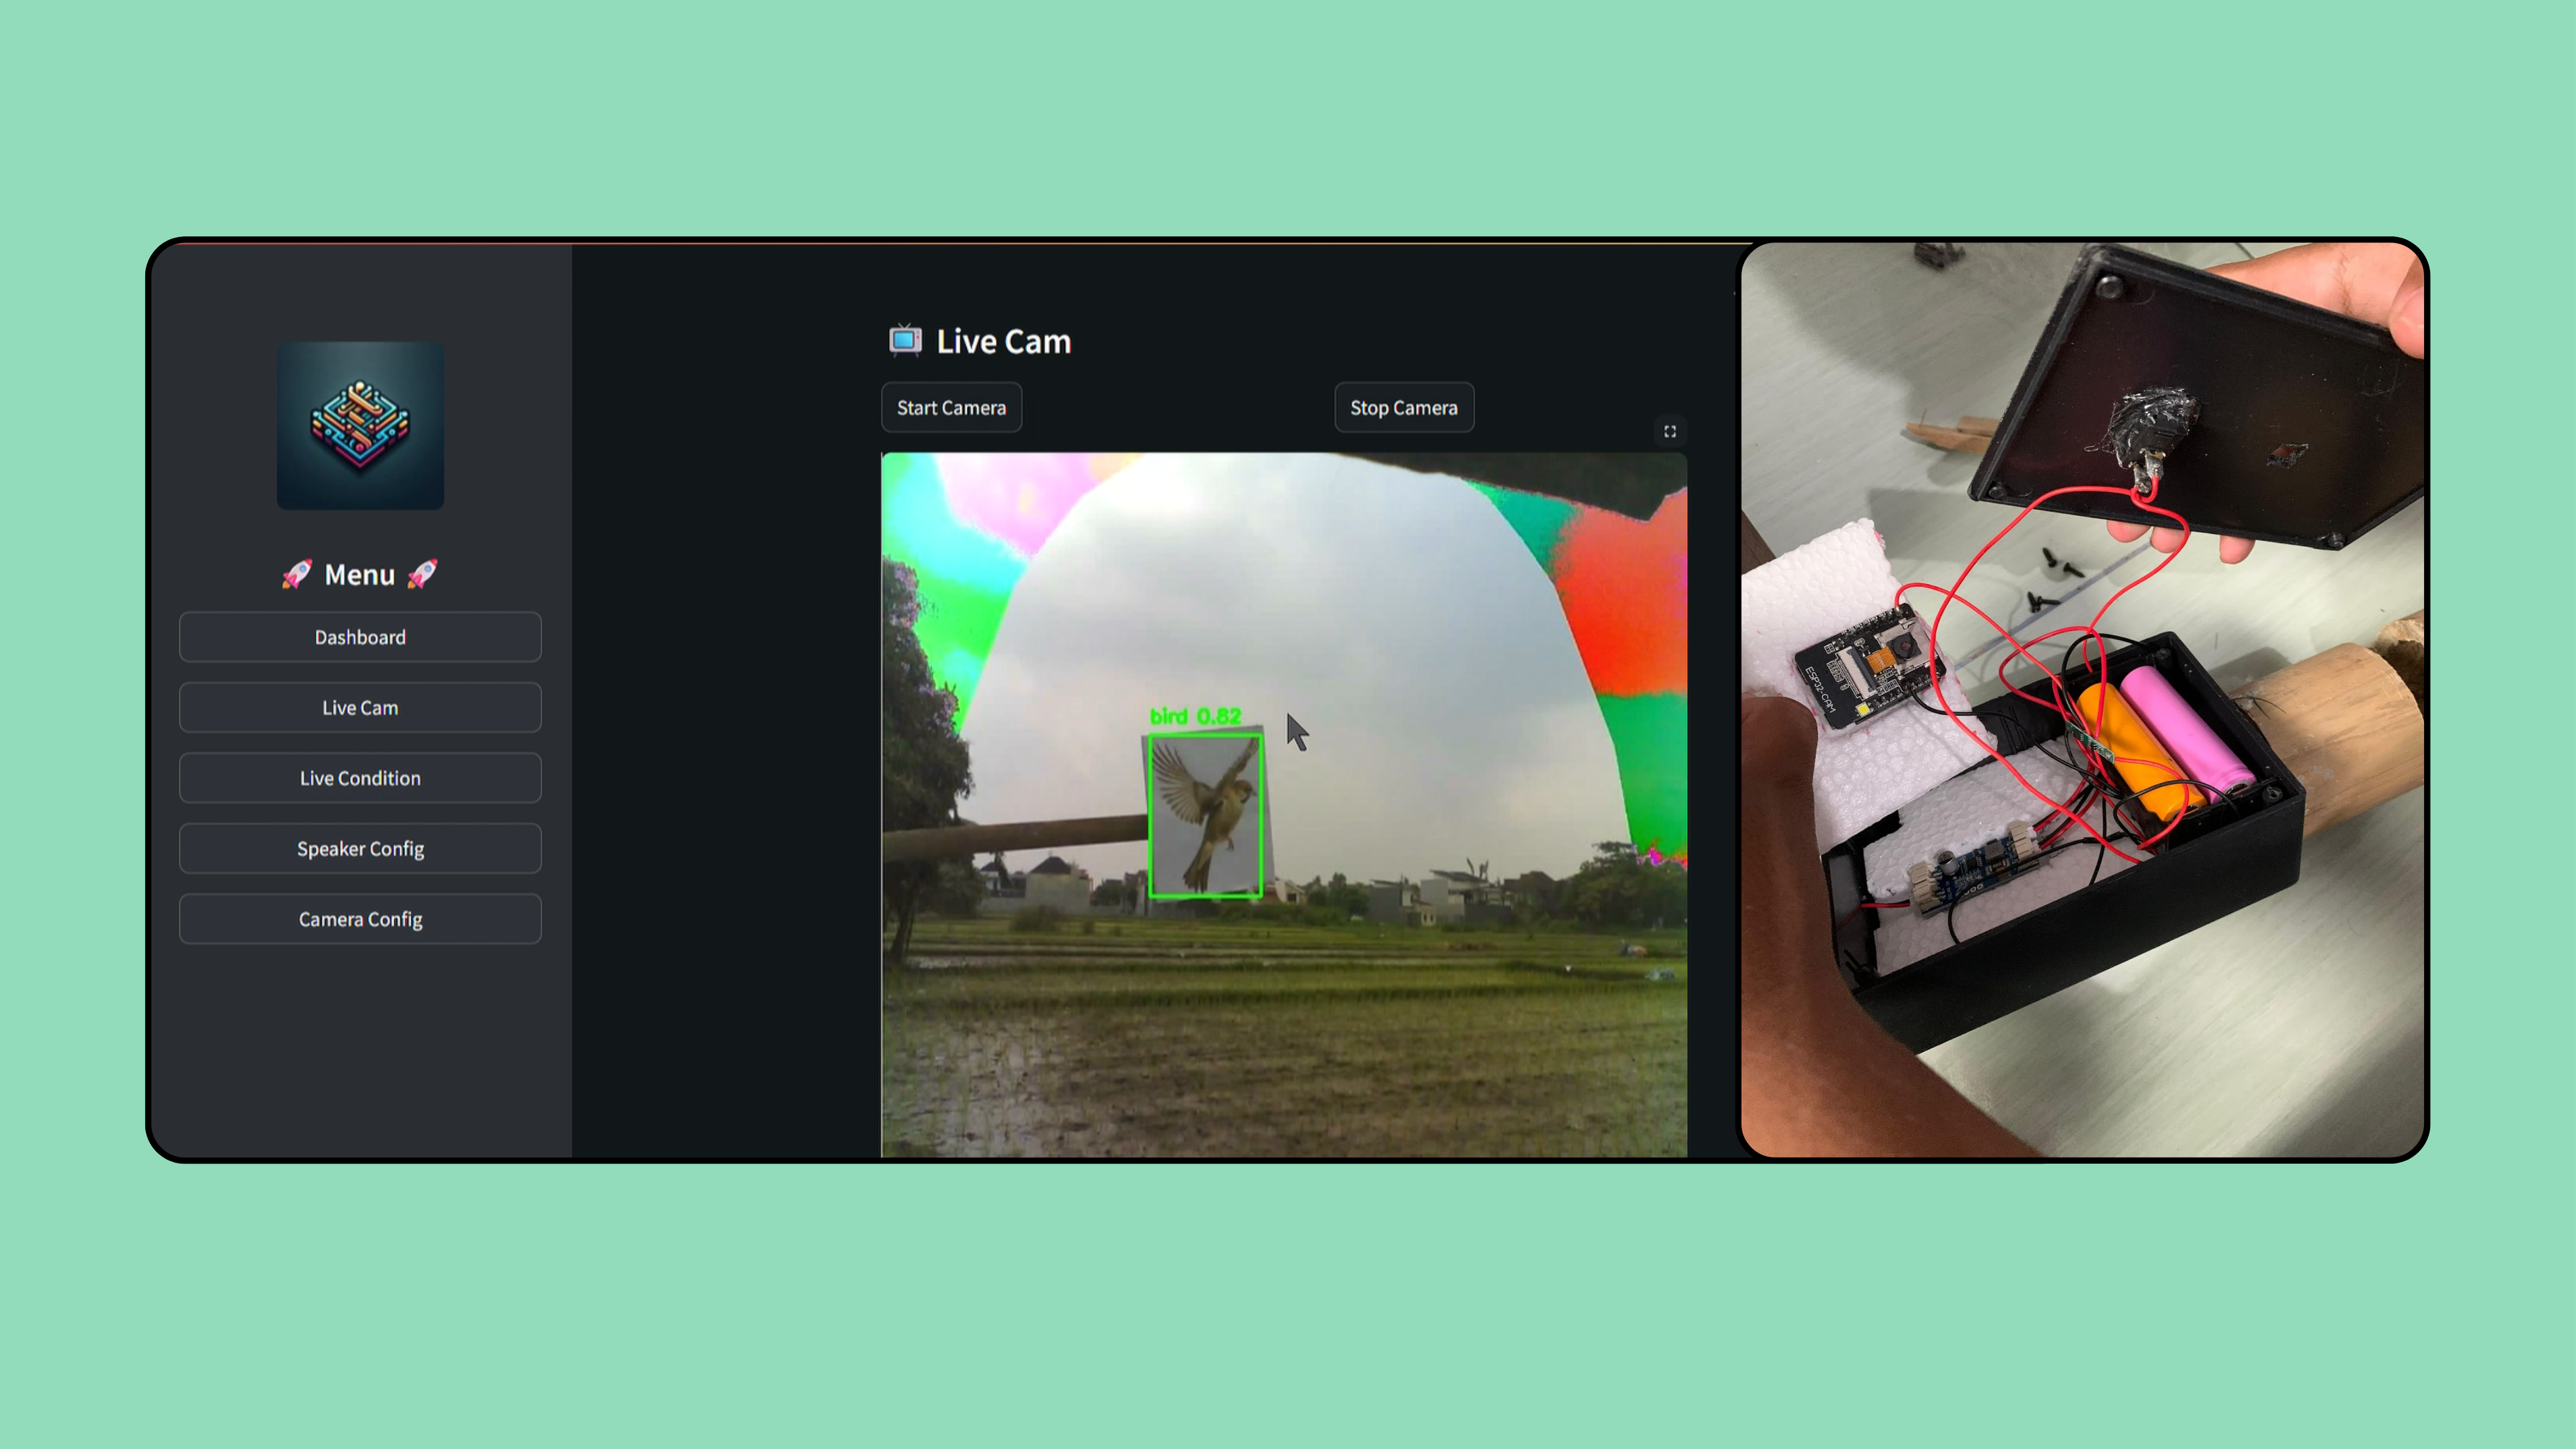
Dalam project AI Bird Detector, saya membangun sistem IoT yang bisa mendeteksi burung secara real-time dan mengaktifkan speaker pengusir. Artikel ini menjelaskan keputusan arsitektur dan lessons learned.
The Problem
Petani kehilangan hingga 30% hasil panen karena burung yang memakan padi. Solusi manual seperti orang-orangan sawah tidak efektif dan membutuhkan pengawasan terus-menerus.
Architecture Overview
┌─────────────┐    ┌─────────────┐    ┌─────────────┐
│  ESP32-CAM  │───▶│  Flask API  │───▶│   YOLOv5    │
│   (Solar)   │    │   Server    │    │  Detection  │
└─────────────┘    └─────────────┘    └─────────────┘
        │                │                  │
        │                ▼                  ▼
        │         ┌─────────────┐    ┌─────────────┐
        └────────▶│  Streamlit  │    │   Speaker   │
                  │  Dashboard  │    │   Trigger   │
                  └─────────────┘    └─────────────┘
Key Architecture Decisions
1. ESP32-CAM vs Raspberry Pi
| Aspect | ESP32-CAM | Raspberry Pi |
|---|---|---|
| Cost | ~$10 | ~$50+ |
| Power | ~0.5W | ~3-5W |
| Processing | Limited | Full Linux |
Decision: Pilih ESP32-CAM karena:
- Cost efficiency untuk multiple deployment
- Lower power consumption → viable untuk solar panel
- Processing bisa di-offload ke server
⚖️ Trade-off: Limited onboard processing, tapi acceptable karena server tersedia.
2. Edge vs Cloud Inference
Option A: Edge (On-device)
- Pro: Low latency, offline capable
- Con: ESP32 tidak cukup memory untuk YOLO
Option B: Cloud Inference
- Pro: Can use full YOLO model
- Con: Depends on network
Decision: Cloud inference dengan fallback behavior. Jika network down, speaker tetap aktif secara periodik.
3. YOLOv5 Model Selection
Tested beberapa variants:
YOLOv5n: 1.9M params, 45fps, 28.0 mAP
YOLOv5s: 7.2M params, 35fps, 37.4 mAP ← Selected
YOLOv5m: 21.2M params, 20fps, 45.4 mAP
Decision: YOLOv5s — balance antara accuracy dan speed untuk real-time detection.
ESP32-CAM Code
#include <WiFi.h>
#include <esp_camera.h>
#include <HTTPClient.h>

// Camera pins for AI-Thinker model
#define PWDN_GPIO_NUM     32
#define RESET_GPIO_NUM    -1
#define XCLK_GPIO_NUM      0
#define SIOD_GPIO_NUM     26
#define SIOC_GPIO_NUM     27

void setup() {
    Serial.begin(115200);

    // Initialize camera
    camera_config_t config;
    config.ledc_channel = LEDC_CHANNEL_0;
    config.pixel_format = PIXFORMAT_JPEG;
    config.frame_size = FRAMESIZE_VGA; // 640x480
    config.jpeg_quality = 12;
    config.fb_count = 1;

    esp_err_t err = esp_camera_init(&config);
    if (err != ESP_OK) {
        Serial.printf("Camera init failed: 0x%x", err);
        return;
    }

    connectWiFi();
}

void loop() {
    camera_fb_t *fb = esp_camera_fb_get();
    if (!fb) {
        Serial.println("Camera capture failed");
        return;
    }

    // Send to detection server
    sendToServer(fb->buf, fb->len);

    esp_camera_fb_return(fb);
    delay(2000); // 2 second interval
}

void sendToServer(uint8_t *data, size_t len) {
    HTTPClient http;
    http.begin("http://server-ip:5000/detect");
    http.addHeader("Content-Type", "image/jpeg");

    int httpCode = http.POST(data, len);

    if (httpCode == 200) {
        String response = http.getString();
        if (response.indexOf("bird") != -1) {
            triggerSpeaker();
        }
    }

    http.end();
}

void triggerSpeaker() {
    // GPIO untuk relay speaker
    digitalWrite(SPEAKER_PIN, HIGH);
    delay(5000);
    digitalWrite(SPEAKER_PIN, LOW);
}
Flask Detection Server
from flask import Flask, request, jsonify
import torch
from PIL import Image
import io

app = Flask(__name__)

# Load YOLOv5 model
model = torch.hub.load('ultralytics/yolov5', 'custom',
                       path='bird_detector.pt')
model.conf = 0.5  # Confidence threshold

@app.route('/detect', methods=['POST'])
def detect():
    if 'image/jpeg' not in request.content_type:
        return jsonify({'error': 'Invalid content type'}), 400

    # Read image from request
    img = Image.open(io.BytesIO(request.data))

    # Run detection
    results = model(img)

    # Parse results
    detections = []
    for *xyxy, conf, cls in results.xyxy[0]:
        detections.append({
            'class': model.names[int(cls)],
            'confidence': float(conf),
            'bbox': [float(x) for x in xyxy]
        })

    # Log for monitoring
    bird_count = sum(1 for d in detections if d['class'] == 'bird')
    if bird_count > 0:
        print(f"🐦 Detected {bird_count} birds!")

    return jsonify({
        'detections': detections,
        'bird_detected': bird_count > 0
    })

if __name__ == '__main__':
    app.run(host='0.0.0.0', port=5000)
Lessons Learned
Setelah 6 bulan development dan field testing:
1. Power Consumption is Critical
Solar panel 10W + battery 18650 cukup untuk operasi 12 jam. Tapi:
- Deep sleep mode wajib saat malam
- Reduce capture frequency saat battery low
2. Field Testing != Lab Testing
Di lab: 95% accuracy Di sawah: 85% accuracy
Penyebab:
- Lighting conditions berbeda
- Bird species lokal berbeda dari training data
- Weather (rain, fog) affect camera
3. Simple Trigger Logic Wins
Awalnya saya buat logic kompleks:
if bird_detected AND confidence > 0.7 AND not recently_triggeredTernyata simple logic lebih reliable:
if bird_detected: trigger_speaker()💡 “Simple architecture that works > complex architecture that might fail”
Result
Setelah deployment di 3 lokasi:
- Speaker activation rate: ~15x/hari
- Farmer feedback: “Lebih efektif dari orang-orangan sawah”
- System uptime: 97%
Kesimpulan
Membangun IoT + AI system membutuhkan banyak trade-off antara cost, power, accuracy, dan reliability. Key takeaways:
- Start simple — complexity bisa ditambahkan later
- Test in real conditions — lab ≠ field
- Monitor everything — logging saves debugging time
- Design for failure — network down, battery low, camera fail
Feel free to reach out kalau ada pertanyaan tentang IoT atau AI integration!